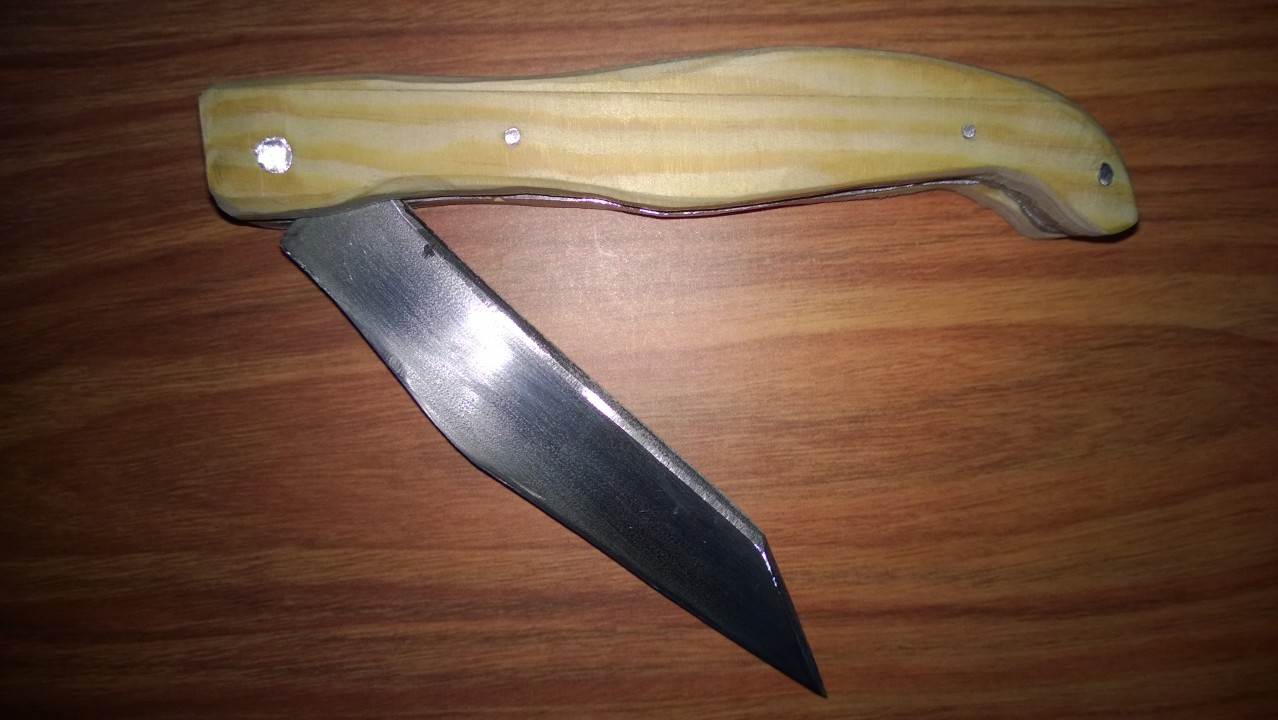
Another knife, another style, another finish...
Needed materials :
- Metal slat for the blade, the mechanism and the structure.
- Fir slat of 25mm * 7mm * 15cm for he handle
- Screws - Nails of 25mm, 20mm and 18mm diameter
Needed tools :
- A grinder to cut the metal
- A multitool like Dremel to cut the small part
- A drill with wood and metal bit of the nails diameter (here 25mm, 20mm and also 50mm)
- A buff to mount on the grinder
- Sandpaper with several grains(280, 400, 600 et 1000) to sand the blade and remove imperfections.
- A grinding wheel to start the sharpening of the blade and remove the overload on wood in order to align the handle and the mechanism of the knife.
- A sharpener
- A nippers
- A ball peen hammer
In summary for the metal part I drew the needed pieces on the metal slat and I cut them using the grinder. Then O drilled holes for the spring (20mm) and the for blade (25mm). Finally I polished and sanded the blade. At this step I did a first dry test to check if the spring tension was good enough and if the blade was aligned to a part of the handle. Once done I screwed with a screw of 20mm diameter on the middle hole. and I cut and filed down.
Then for the handle I screwed holes for the wood location (20mm) and I milled those holes with a 50mm bit so when I will screw the head of the screw will be down. I took a side of the handle and by using a clamp I fixed the wood and the metal. Then I drilled holes in the wood thanks to the holes already present in the metal part. Once done we can screw the fir slats? Then in order to give the knife form I used the grinding wheel to remove the wood overload on the two sides. Always by using the grinding wheel I sanded everything so it is all aligned. I did a new dry test to validate that everything was ok.
Finally it's just a matter of assembling everything and to cut the screws that are exceeding on each side by letting 1 or 2 mm for the riveting. Once riveted I did a last pass to the grinding wheel to polish those riveted nails and align everything. The blade still needs to be sharpened with the grinding wheel first then with some sanding and a sharpener. It's time for the finishes (varnishing, engraving,...).


http://arnaudletellier.be/index.php?option=com_content&view=article&id=12:couteau-pliant-v2-0&catid=12&Itemid=108#sigFreeId00d7597069